How To Paint A Bike? – Several Details
Russell Franklin - September 21, 2022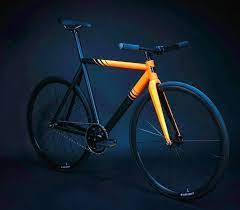
The appearance of bikes deteriorates as they become scratched. Giving them a new paint job is fortunately not too difficult. Only a few tools, some spray paint, and some time are required. It’s all worthwhile because the outcome gives the bike a much better appearance.
Table of Contents
Reasons For Painting A Bike
There are many justifications for painting a bicycle. It would be a shame to dispose of the bike because it may still be functional but no longer look good due to scratches or peeling paint. Perhaps the bike, which has since grown dated, is also connected to special feelings and memories. A creative hobby for some people is painting bikes. A kid’s bike needs to be painted brightly for this purpose because it’s frequently passed down among friends or family.
Which Materials Are Needed To Re-paint A Bicycle?
Of course, paint is necessary if you want to give your bike a fresh coat of paint. But when painting a bike, there are some other supplies that are also useful. These include the equipment required to take the bike apart and get it ready for painting.
Preparation
Your bike must be completely disassembled into its component parts and then sanded down before you can paint it. The parts must be disassembled using specialized equipment. The necessary screwdrivers and wrenches may already be in your possession, but if not, you can buy them at any hardware store or order them online.
You will need sandpaper to remove the bike’s old paint. Some paints might require chemical removal in order to be removed, rather than just being sanded off.
Not only must the old paint be thoroughly removed, but grease must also be completely removed from all the surfaces that will be painted. This can be accomplished by using a degreaser. While glass cleaner works just as well, white spirits are more appropriate for this application.
How To Paint A Bike?
1. Start Stripping The Bike
Therefore, everything that is fastened to the frame must be removed. The seat, wheels, chain, derailleur, and other components are all of that. The following are necessary for removal:
- chain tool
- Allen wrench (4mm, 5mm & 6mm)
- Socket wrench
- Crescent wrench
Additionally, spray paint and a clear coat are required for painting. I used:
- Blue Krylon Dual
- Krylon Clear Coat
Use those resources to start. Everything you need to take off a bike is fairly obvious, which is one of the fun things about them. Is there a hole for an Allen key? Good, use an Allen wrench! The brakes, bar stem, and bottle holders are now taken care of. To remove the crank arms, front fork, and chain from the bicycle, respectively, use the crescent wrench, socket wrench, and chain tool.
Remember to take note of every component you remove if you’re just starting out because you’ll need to put it back together later. Be sure to carefully store every piece of equipment as well. A few minor pieces are simple to misplace along the way.
2. Clean It Up
So you now possess the bicycle frame. To remove all the grease and dirt, clean it with a suitable cleaner. Although there are many options available here, I chose Pedro’s, Green Fizz.
3. Sand It Little
Sand the old paint’s surface using some sandpaper. Although I could have gone even finer, I used 150 grit in this instance. Not entirely removing the old paint is not the goal; the goal is to provide the new paint with a solid surface to adhere to.
Once that is finished, use a damp cloth to thoroughly clean the frame to remove all the dust.
4. Cover Up Anything You Don’t Want To Paint
The crank arms on this bike were rigid and in poor condition. Okay, I guess I wasn’t going to take them out after all. This isn’t too bad because it’s simple to cover them with plastic bags and cover the entire crank arm with masking tape to keep them neat.
I covered the brake posts with masking tape in addition to the crank arms.
5. Paint
Okay, we can now start painting. Some advice hang the entire frame by running a wire through the head tube. I chose to do it on a tarp in two phases because I didn’t have a good place to hang the bike at my house.
With the frame resting on the seat post opening and the rear dropouts, the first phase was carried out as shown in the first picture here. On a crank arm and one of the chainstays, I supported it during the second phase of construction. While not particularly elegant or stable, it does the job.
I used three coats of blue Krylon Dual spray paint for each painting phase. Simply remember to wait at least five minutes between coats. This led to the application of six different paint coats in two phases.
I then applied three coats of Krylon Clear Coat using the same procedure after letting everything dry for the night.
6. Put Everything Back On
Reassembling all the parts is now necessary. This should go quickly and without difficulty, if you paid attention and carefully put away all of your pieces. If not, it might be a little annoying.