How To Put A Bike Chain Back On? – 2 Useful Methods
Russell Franklin - October 12, 2022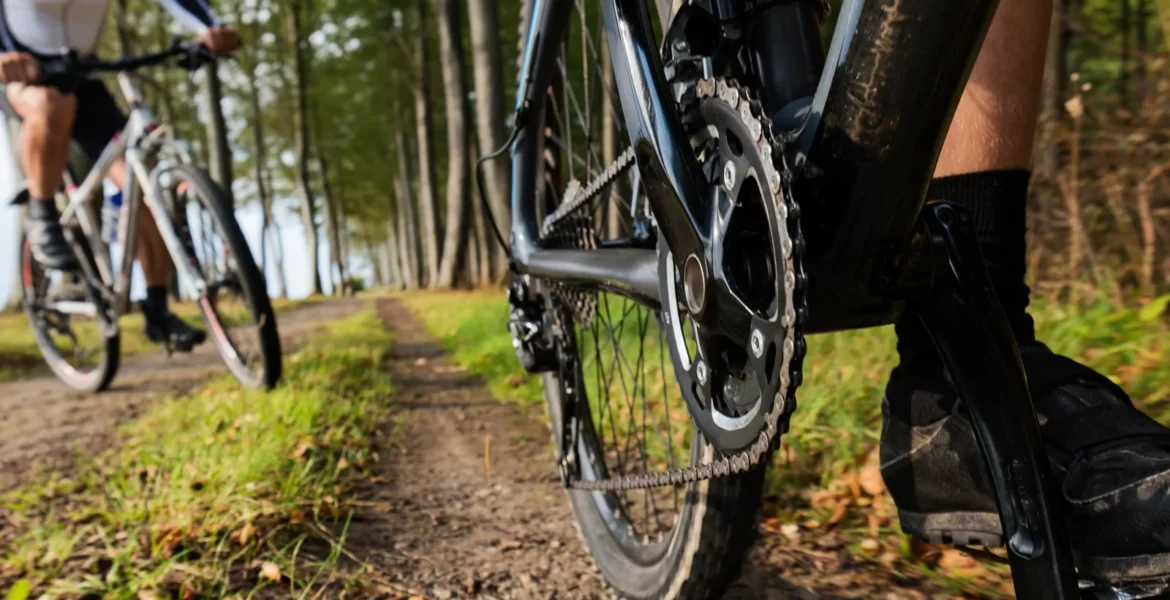
Did you find it difficult to fix your bike chain? Then we are in the same boat as you. After years of cycling, I’ve come to the conclusion that in order to increase the lifespan of your bike, you need to know a few difficult-to-learn maintenance tips.
The trickiest component of our bikes is frequently the chain, so learning how to put a bike chain back on the derailleur requires constant caution.
Thankfully, if you have the right equipment and knowledge, you can do it in the convenience of your own home. Just keep your fingers out of the chain, and while you’re at it, always wear safety gloves.
Table of Contents
Why Does Your Bike Chain Fall Off
It’s important to comprehend the significance of a bike chain and the reasons why it can come off in order to avoid missing important steps in how to put it back on. Your bicycle’s chain is an easily noticeable component. It is a long, slender piece of your bike that is essential for transmitting power from the pedal to the wheel.
Steel plates are riveted together to form a hardened steel material that is typically used to make bicycle chains. These steel plates are incredibly flexible and long-lasting. Using a drive system from your bicycle derailleur, they flex as you move. Your bike chain may occasionally come off, in which case you will need to reinstall it. Here are the major reasons why the chain is slipping off:
1. Lose part
A loose component might be the most straightforward cause of your bike chain slipping off. As a result, you need to thoroughly inspect your chain and determine which part might be missing.
Inner and outer plates, rollers, and pins are the chain’s four main components. By moving the bike chain, you should examine each of these four. It’s time to tighten up that part if you hear a rattle or notice any movement. After that, go through the chain once more to make sure nothing is loose.
2. The chain is very long
Sometimes you don’t realize that you replaced your bike chain for a longer period of time than necessary. You will always experience a chain falling off if the chain is not perfectly fitted to your bike or pedal. In order to prevent this incident, it is crucial to measure both your bike and the replacement chain. To achieve this, trim the chain until it perfectly fits your bike by removing a few of the extra links.
3. Worn-out chains
Of course, chains that are worn out won’t function well while you’re driving. Already bent and battered, the chain has sustained damage. It must be replaced so that your bike can operate more effectively.
4. Shifting your bike too hard
Seven gears that are used for shifting are standard on most bikes. Your bike chain will come loose if you unintentionally shift your bike too hard while expecting an eight-gear. It implies that your bike’s derailleur might stretch too far to comply with your request.
After identifying the reasons for your chain falling off and performing some quick fix, yet, the chain keeps slipping, here is the step-by-step guide you need to do:
- Put back the chain that comes off the sprocket
- Getting your jammed chain off
- Threading the bike chain back using the pedals
- Final inspection
Prepare The Things You Need
The type of bike chain you use only during the removal process will largely determine all the tools you’ll need. However, given that you’re done with tweaking and all you have to do is to put back the bike chain, you will only need the following:
- Protective Gloves
- Chain Tool
How To Put A Bike Chain Back On?
1. Replacing a Slipped Chain
Find the slippage. The chain may occasionally veer off course while being used, but it won’t break. Since the chain is still passing through both the front and rear derailleurs, no special maintenance is required in this situation; all that is typically required is to reattach the chain to the sprocket. When you slide off the bike, get off and search for the slippage. The chain typically slips off the front sprocket while continuing to pass through both derailleurs.
Using the quick release will free up a stuck chain. On occasion, a slippage will cause the chain to become stuck between the frame and the rear sprocket. In this situation, it is wise to unfasten the wheel nut and loosen the rear wheel’s quick release in order to free the wheel from the chain. Simply pull the chain out once the rear wheel has been sufficiently loosened.
If your bicycle has a rear derailleur, loosen the chain. Simply loosen the chain and wrap it around the front sprocket on bicycles with rear derailleurs. The rear derailleur is usually spring-loaded on bicycles to keep the chain tight while riding. Take advantage of this by moving the rear derailleur’s arm forward to add chain slack. Use the remaining slack to wrap the chain’s other end around the smallest front sprocket. A tight chain should be achieved by releasing the rear derailleur’s arm.
On a bicycle without a derailleur, move the pedals. If your bike doesn’t have a derailleur, you can pedal to catch the chain on the sprocket. Many bikes (like “fixies”) don’t have derailleurs. In this situation, securing a loose chain involves carefully rotating the pedal backward while securing the chain to the rear sprocket and securing as much of the chain as you can to the bottom of the front sprocket. The chain should “catch” and begin to turn around the front sprocket. When the “caught” portion gets to the top of the front sprocket, the chain should begin running through the bike’s gears as normal.
Until the bike is in the proper gear, gently pedal forward. Lean forward slowly as you pedal your bike. If your bike has gears, your chain may “jump” back into the gear it was in when the slippage occurred. If not, continue gear-shifting until the chain pedals easily.
Make a few last-minute checks. Make sure you are wearing comfortable gear before you resume normal riding. Change the rear and front derailleurs’ gears, if your bike has them until your chain spins silently and smoothly.
2. Replacing a Broken Chain
Purchase a new chain and a chain tool. You will need a new chain that fits your bike and a chain tool to remove the old chain from your bike and secure the new chain in place if you want to replace a bike chain that has broken or completely fallen off. To connect the new chain to the bike, you will also require a replacement pin, but it ought to be included with the new chain.
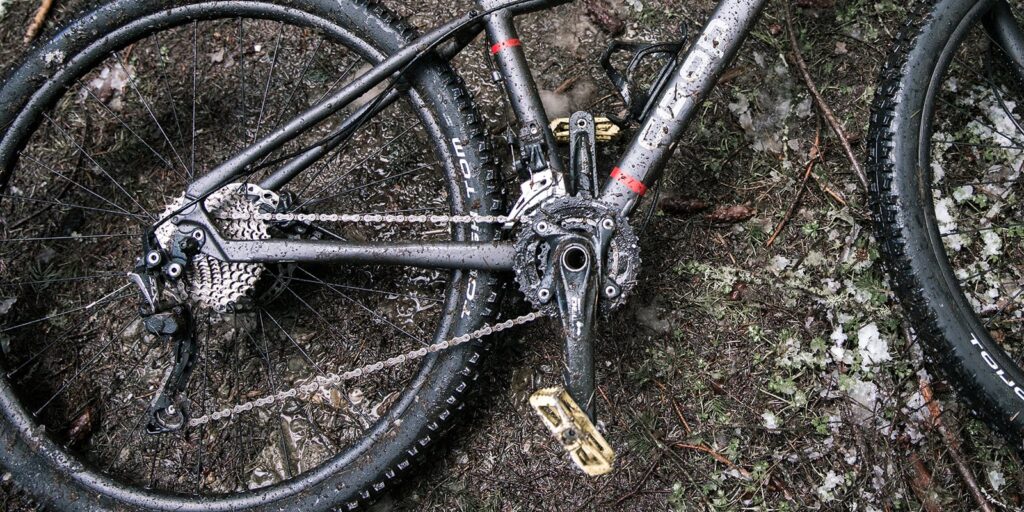
Analyze the damage and, if practical, try to repair it. Stop, then turn your bike over so the sprocket is up. Search for the chain break if the chain is still attached to your bicycle. Finding the two separated ends of the chain should be simple if it is hanging loosely from the sprocket. You can simply begin to attach the new chain if the old one has completely fallen off. For most bike chains, each link is connected to the next by passing a metal pin through the outer “plate” portion of one link and through the inner “roller” portion of the adjacent link. Most bike chains fall into one of 3 categories:
From the bike, take out the broken chain. Get rid of the old chain as soon as possible if you’ve determined that replacing your chain will be simpler than repairing it. Simply rotate the pedals until the entire length of the chain has passed around the sprocket and can be removed if the chain has completely split. If the chain is still holding together, you might need to add a break to make it simpler to take apart. A chain tool can be used to accomplish this.
Raise the rear wheel. The new chain should then be fed through your rear derailleur. If the back wheel isn’t on the ground, turning it may be necessary. This is much simpler. Use any bike racks or hooks you have on the garage wall that let you hang the bike so that the sprockets face you. If not, you might simply want to use any available materials—such as wood, boxes, cinder blocks, or other items—to support the rear of the bike’s frame.
The chain should be pulled through the rear derailleur. On the majority of contemporary bicycles with gears, the rear derailleur is the system of spring-loaded gears hanging down beneath the primary rear sprocket. For a smooth, safe ride, the chain must be threaded through this derailleur properly. Take the “female” end of your properly-sized replacement chain and thread it around the bottom pulley, then up and around the top pulley. When done correctly, your chain should make a smooth, straight, backward “S-shaped” path through the derailleur. Make sure the chain isn’t catching or resting on anything besides the pulleys—if so, there will be a bump in your backward “S”.
The rear cassette should be attached to the chain. The cassette on a gear-equipped bike is just the collection of various sprockets that are fastened to the bike’s back wheel. When the chain is properly threaded through the derailleur, pull it up and over the smallest sprocket in the cassette. After making sure the chain is tight and properly positioned on the sprocket and through the rear derailleur, pull the chain through to create some slack at the lead end.
The front derailleur cage, weaving the chain through. Near the front sprocket of most contemporary bicycles with gears is a metal mechanism that moves to change the chain’s front gear. Turn the back wheel to add more slack as necessary as you feed the lead end of your chain through this front derailleur.
Put the chain on the front sprocket by hand. Align your chain with the smallest of the front sprockets. Stretch it taut so that it firmly engages with the front sprocket’s teeth, then pull it around the sprocket while adjusting the pedals as necessary to create enough slack.
Join the chain’s two ends. Once your chain has successfully traversed your gear system, you can connect the two ends of the chain and resumptively ride. Line up the “female” and “male” ends of the chain in a chain tool (again, available at all bike shops). Be sure that the 2 ends of the chain rest securely in the groove of the tool, hooked onto the “teeth” of the tool. To connect the two links, turn the handle to insert the pin into the chain. Make sure the pin protrudes an equal distance from each side of the link, as even a minor misalignment can cause structural weakness in the chain, potentially leading to another repair.
How Often Should I Clean The Chain On My Bicycle?
Maintaining your bike doesn’t have to be difficult, and if you do, it will give you many more years of riding enjoyment.
Regular chain cleaning will keep your bike in top shape. First things first: clean the grease, mud, and dirt that will inevitably accumulate on your bike’s drivetrain. Before cleaning, degrease your bike because otherwise, you’ll just be moving dirt around. At least once per month should be your goal for degreasing your bike. After that, give it a thorough cleaning to make everything shine.
Conclusion
Did you find this how-to on reinstalling a bike chain on a derailleur to be helpful?
To summarize, wherever you go, it’s crucial to bring a practical tool, such as the Oumers Universal Bike Chain Tool, along with other necessities. Learn the fundamentals of repair as well for your own benefit.
By avoiding costly maintenance and the risks of long rides, you can save some money. Additionally, it keeps you moving even if the chain comes off.
Comment below with your thoughts and tell your friends about this brilliant tip to keep them motivated while driving.